Vpn Site To Site Configuration With Fortigate Guide
You must ensure the following conditions are met:
- VPN Site-to-Site has been created on the Portal
- Fortigate has been installed, enabled, and licensed on the customer side
- Fortigate has been configured with LAN and WAN IPs
Step 1: Configure VPN Site-to-Site
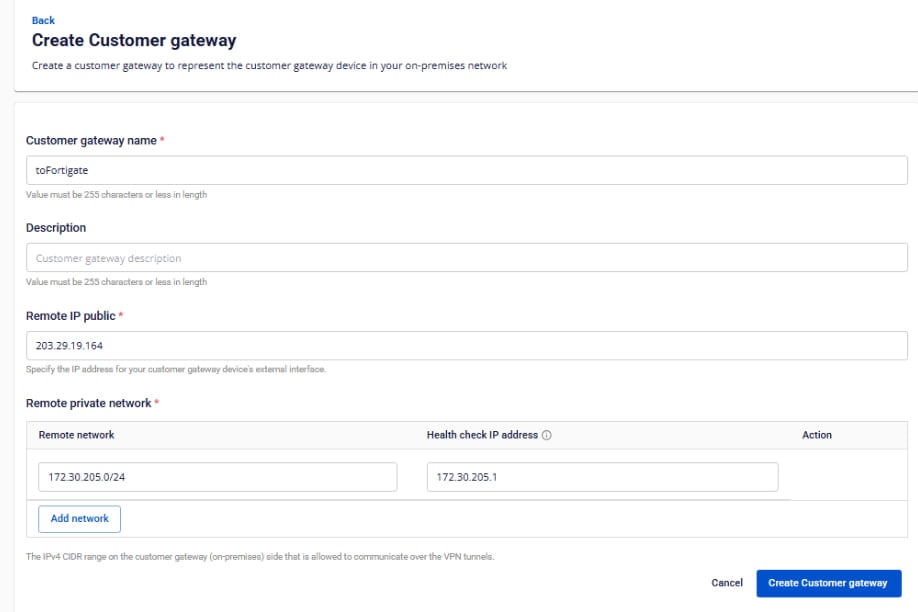
Access and create a VPN Site-to-Site connection on https://console.fptcloud.com/ . -Create a Customer Gateway:
- Remote private network : LAN subnet range to be peered with Fortigate
- Remote IP public: Public IP of Fortigate
-Create a VPN Connection: The “Pre-shared key” value should be saved for configuration on Fortigate. The VPN connection includes three main sections:
- General Information (contains basic connection details)
- Remote VPN Information (contains encryption and customer-side details)
- Dead Peer Detection (number of automatic retries if the connection encounters issues)
Section 1: General Information 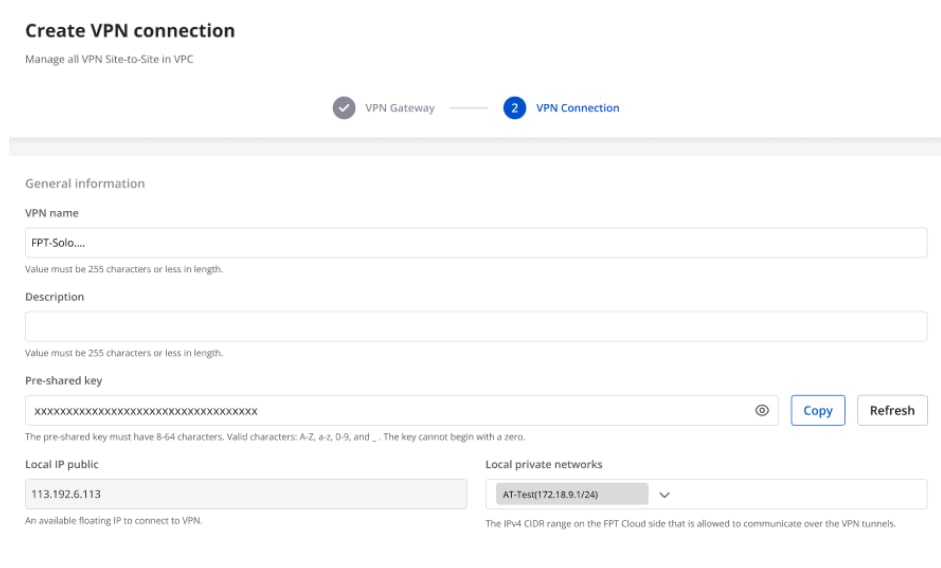 Section 2: Remote VPN Information
  When selecting the provider “Fortigate,” the system automatically fills in the IKE and IPsec information as follows:
For IKE:
When selecting the provider “Fortigate,” the system automatically fills in the IKE and IPsec information as follows:
For IKE:
- Encryption algorithm: aes-256
- Authorization algorithm: sha256
- IKE version: ikev2
- Lifetime units: seconds
- Lifetime value: 28800
- DH Group: GROUP_14
- Phase 1 negotiation mode: main
For IPsec:
- Encapsulation mode: tunnel
- Encryption algorithm: aes-256
- Authorization algorithm: sha256
- Lifetime units: seconds
- Lifetime value: 3600
- Perfect forward secrecy (PFS): GROUP_14
- Transform protocol: esp
Section 3: Dead Peer Detection 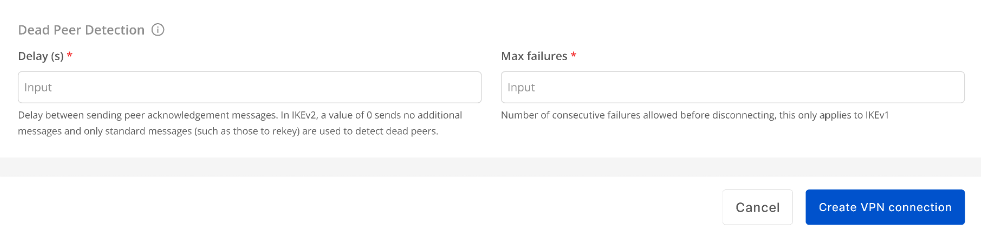 Enter the Delay and Max failures values, then click Create VPN Connection.
Step 2: Configure IPsec on Fortigate
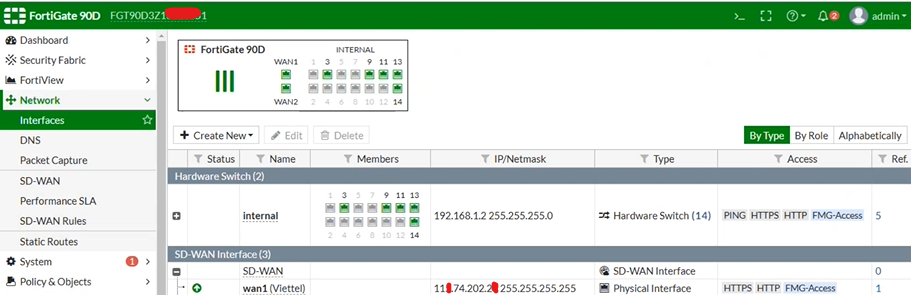
- Log in to the Fortigate web interface:
- Select IPsec Wizard:
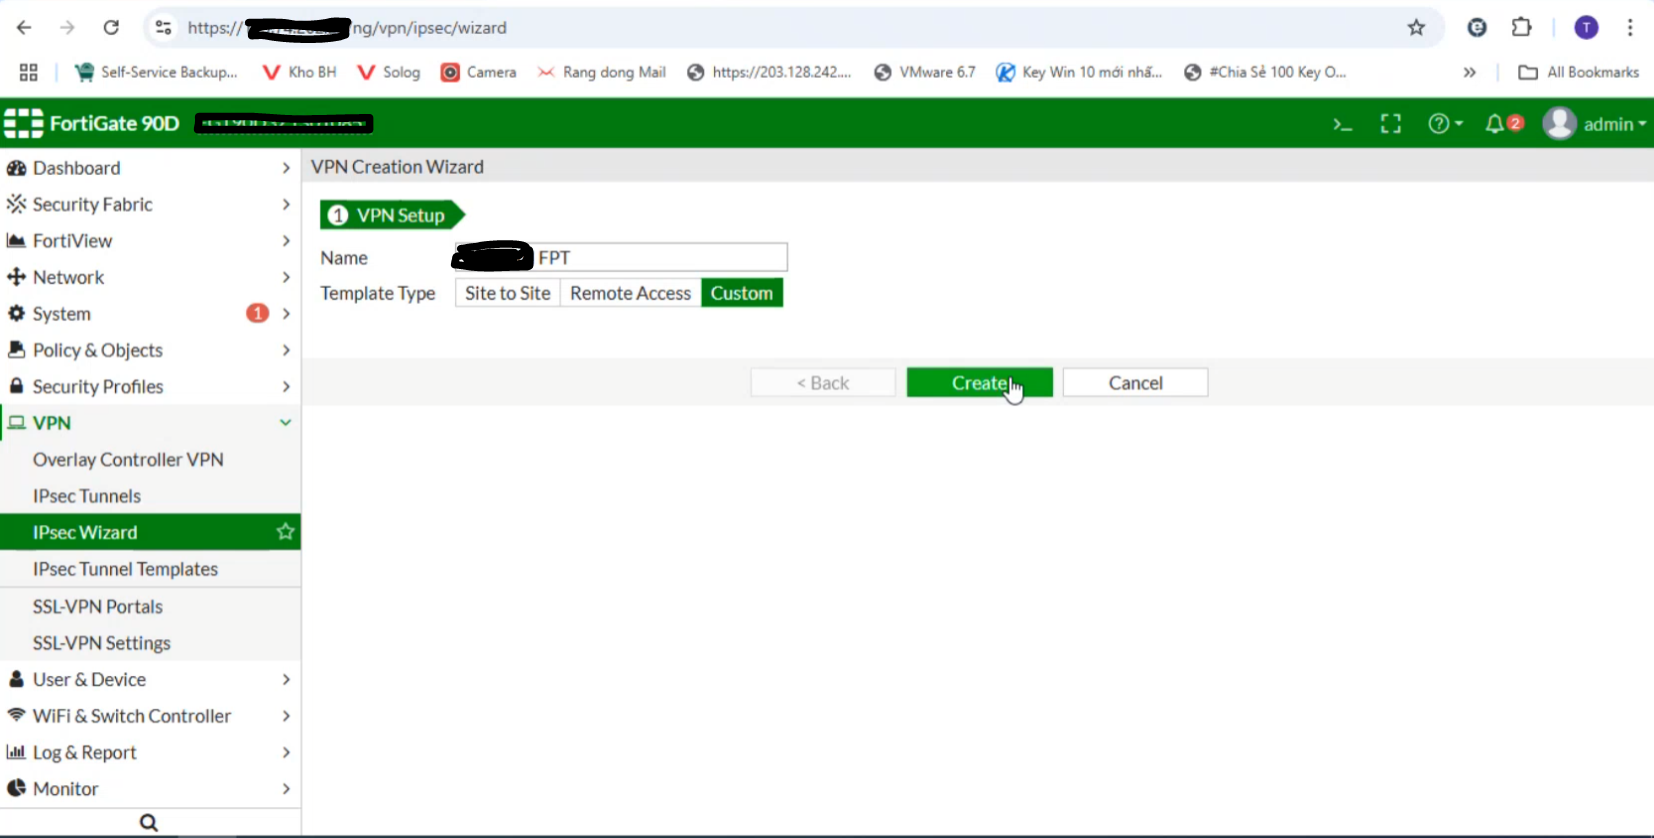
- Go to IPsec Tunnels:
-Enter the IP Address of FPT created in Step 1
-Select the WAN interface (if multiple WANs exist, specify the one you want to use).  Check the connection status on the FPT Smart Cloud Portal:
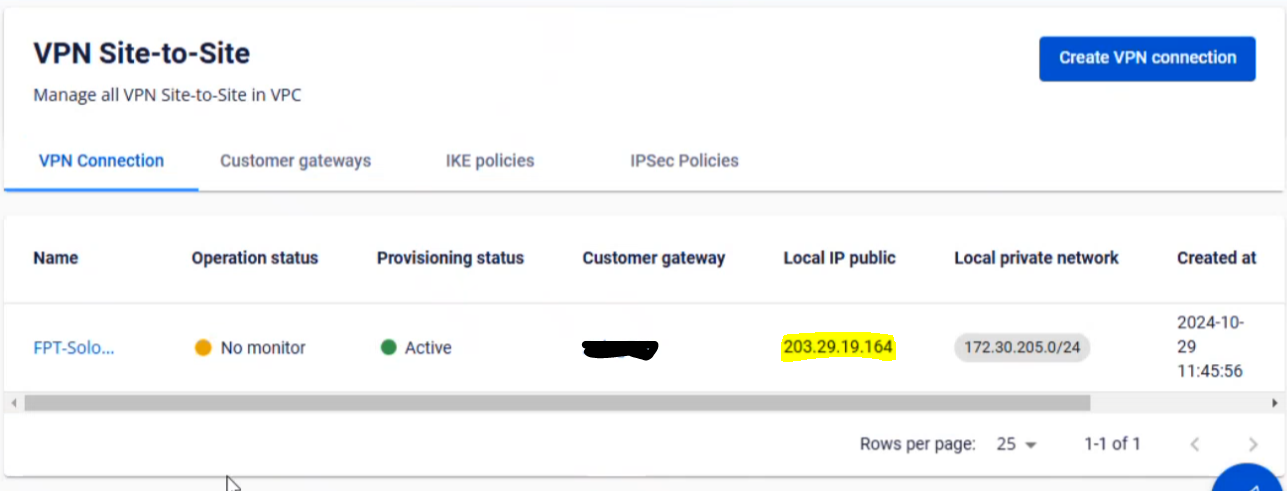
- Enable Local Gateway and select Primary IP
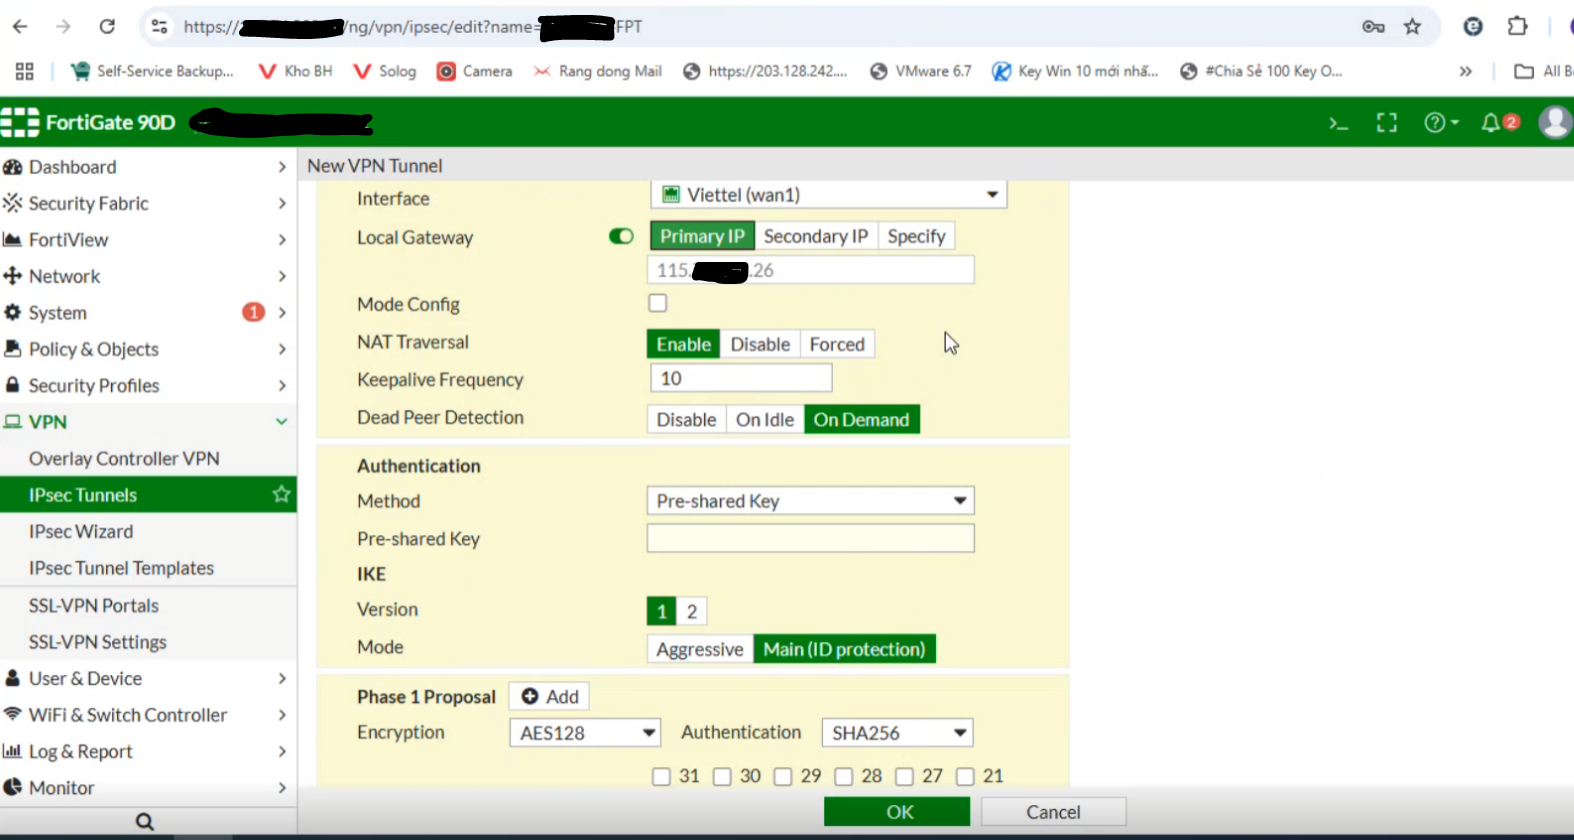
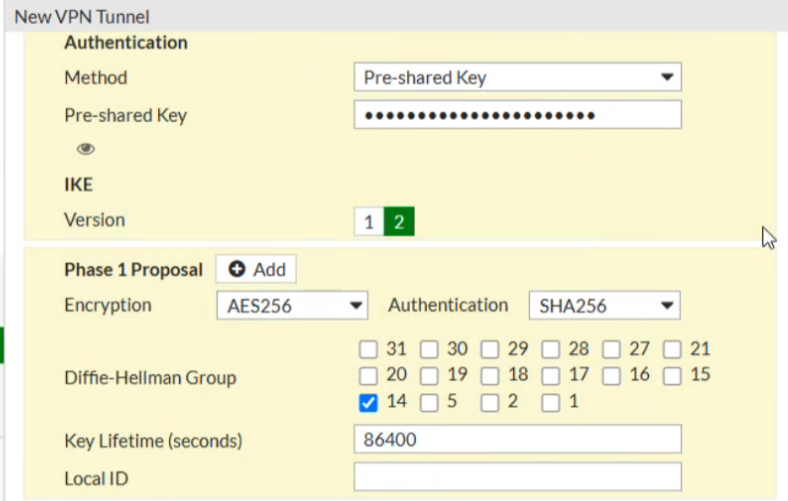
- Set the Method to Pre-shared Key and enter the same key as in Step 1:

Note: If the customer’s setup is behind NAT, configure as shown below and contact L3-FPT Smart Cloud for support. 
- Configure Phase 1 as follows:
If NAT is not used, ensure that NAT mode is disabled.
- Configure Phase 2 as follows:
-Local IP: The customer’s network range to be connected 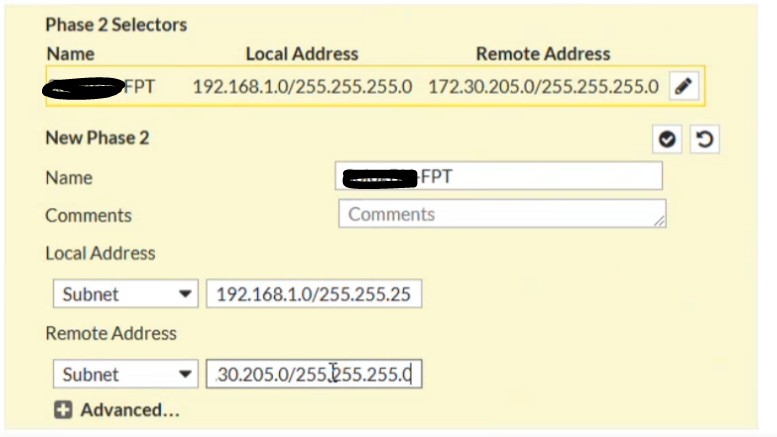
Step 3: Configure Firewall and Routing on Fortigate
- Set the firewall to Allow All for both incoming and outgoing traffic as shown below:
From FPT Cloud to Fortigate: 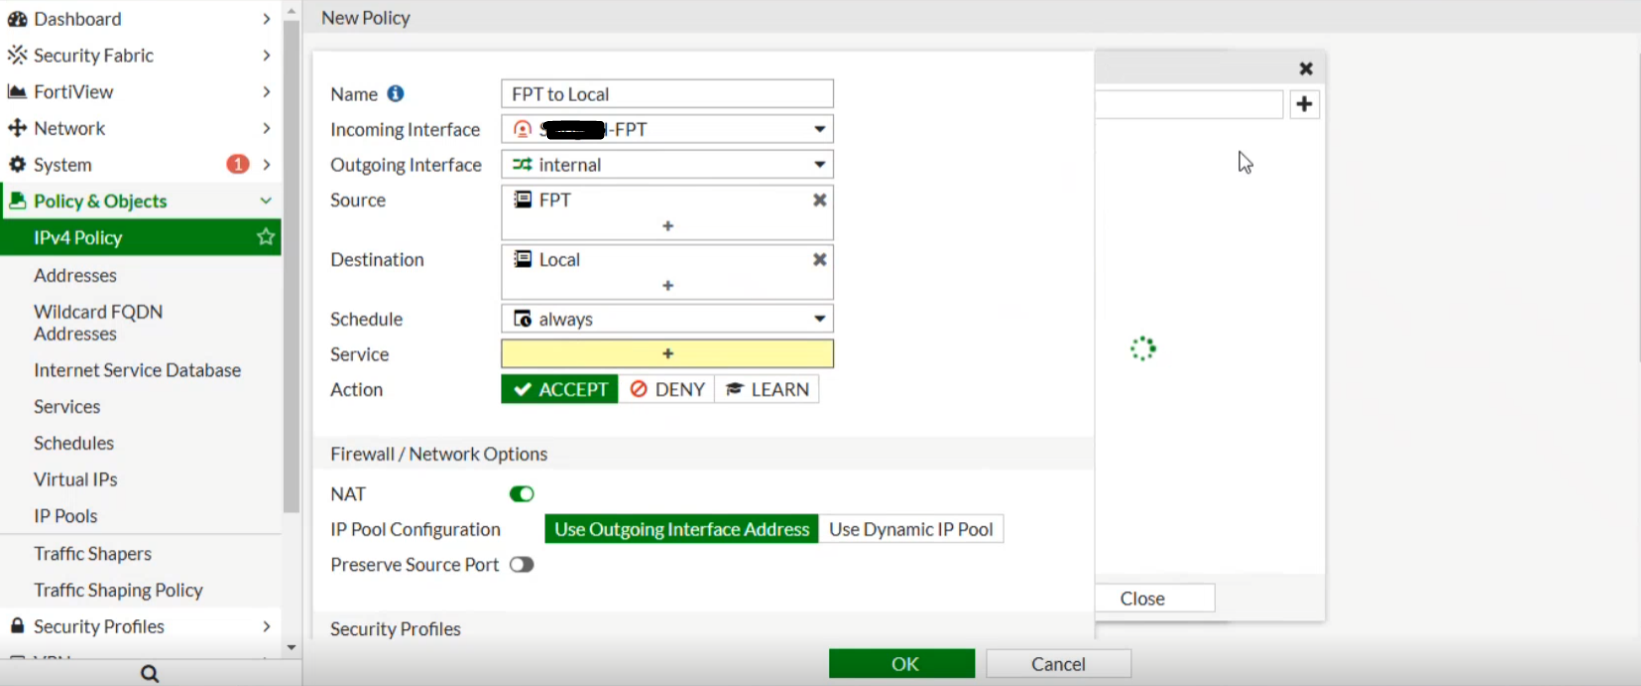 From Fortigate to FPT Cloud:
 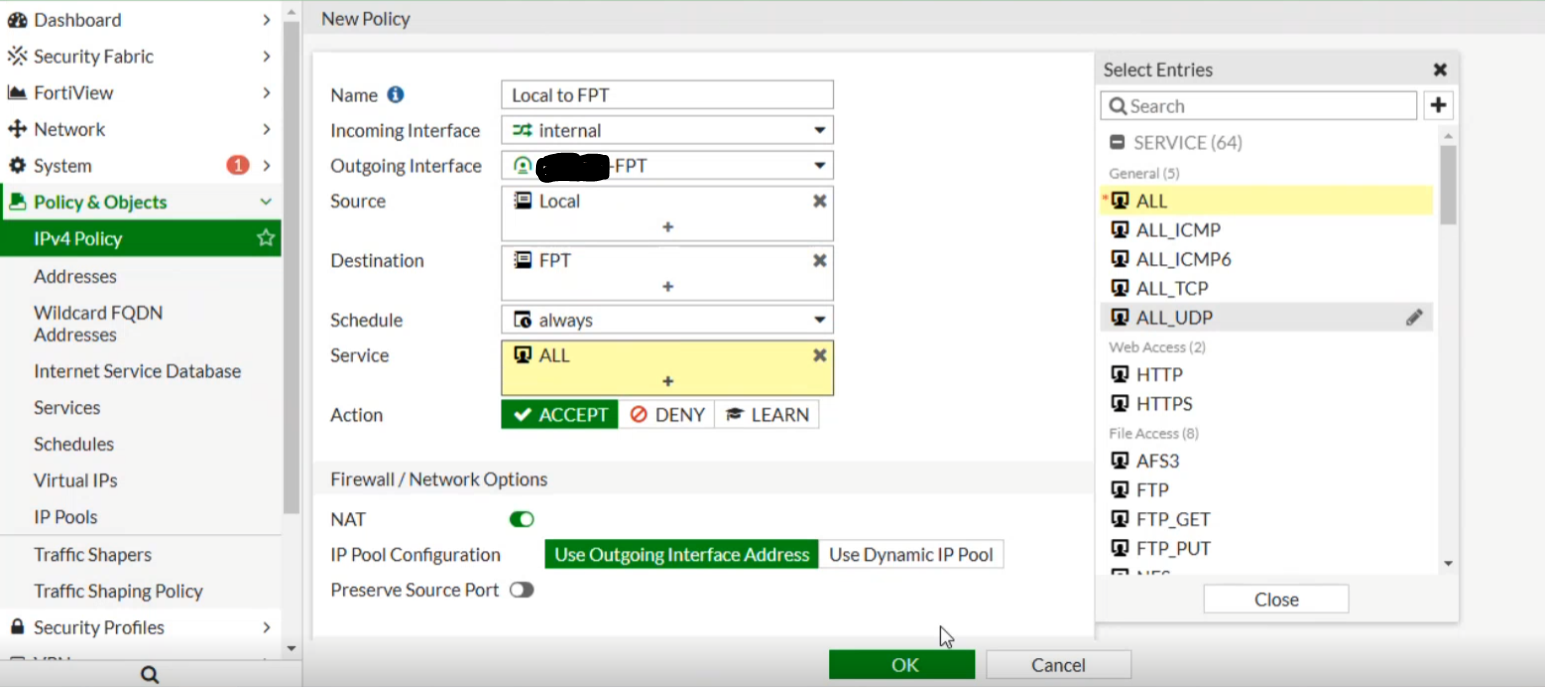 Connection successfully established between FPT Cloud and Fortigate:
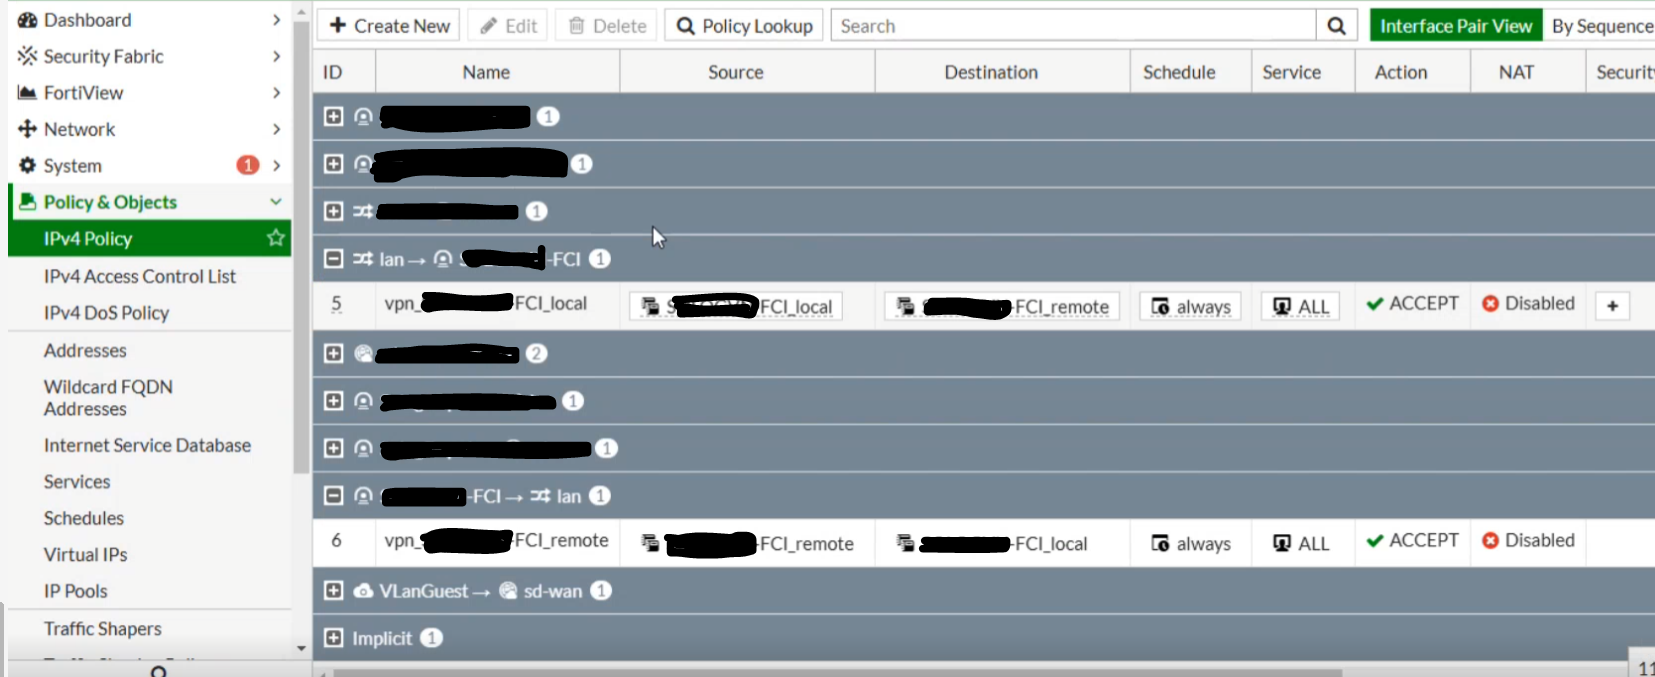
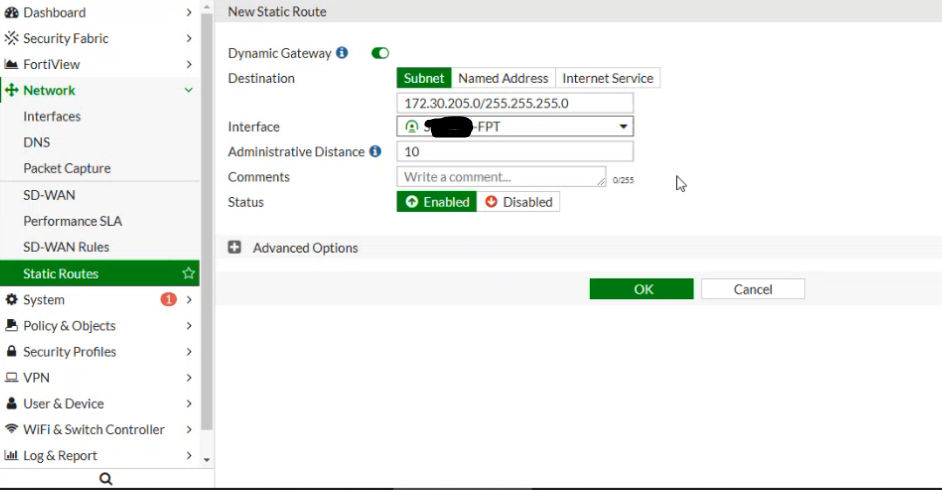
- Set the routing as shown below, where Destination is the FPT-side network (e.g., FCI – 172.30.205.0/255.255.255.0) and Interface is the IPsec Tunnel created in the previous step.
 At this point, you can open the Terminal / Command Line and test network connectivity using ping.