Incident Label
Labeling incidents allow users to effectively filter and gain a better understanding of incident over time. Using labels help group incidents and provide a tag for them - for example, indicating which group is involved, which service is affected, and whether customers are impacted or not.
A. Creating a label
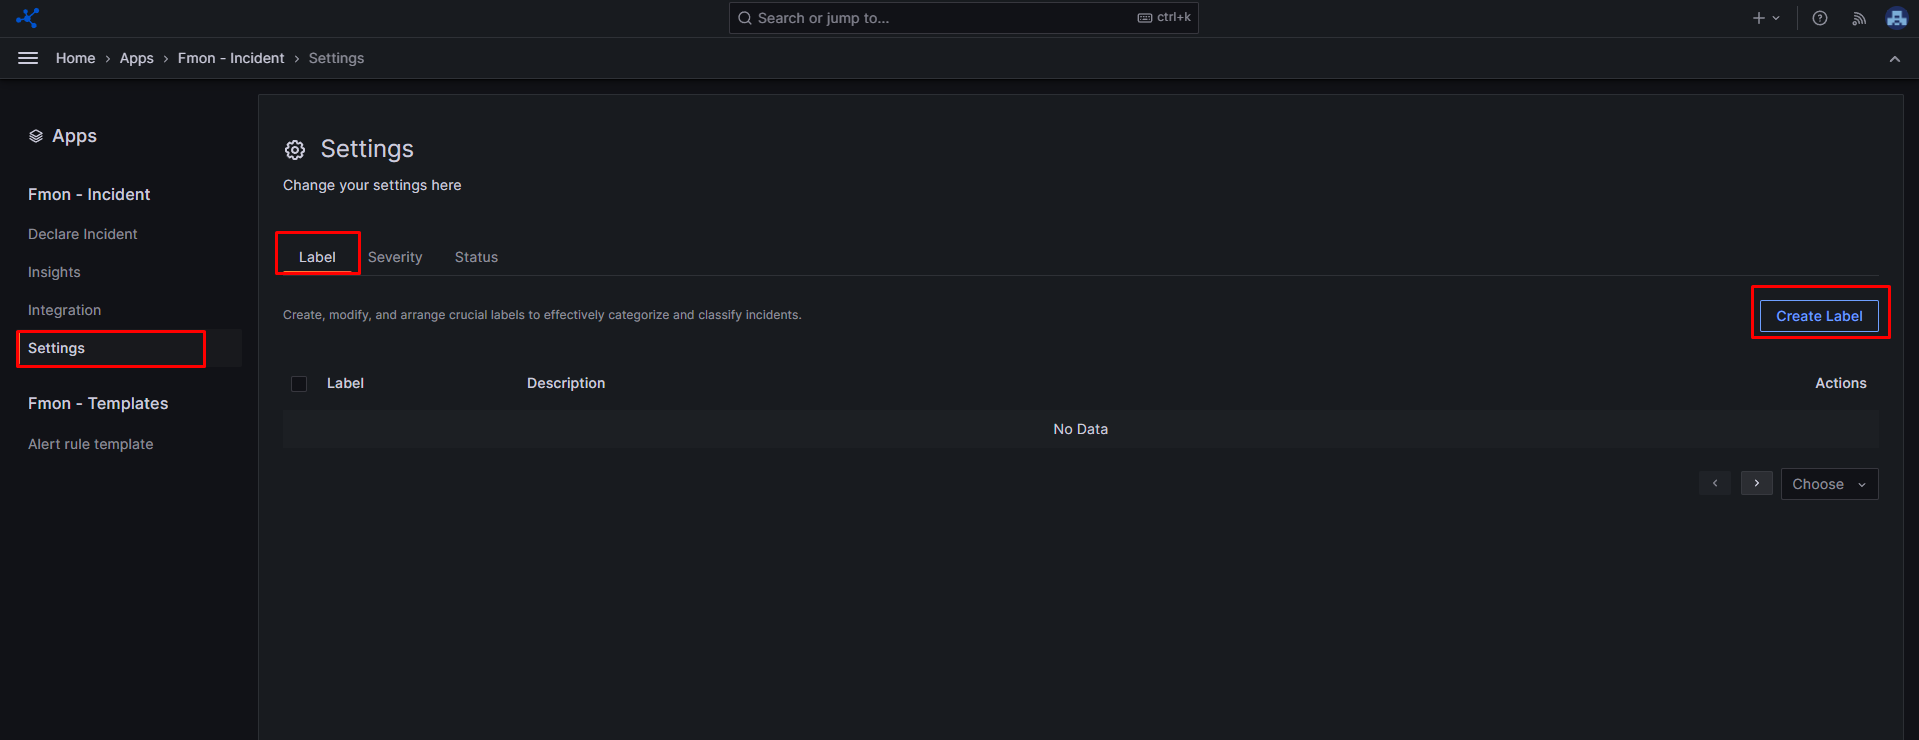
Step 1 : From the sidebar menu, choose Apps , then click FMON - Incident
Step 2 : Click Settings
Step 3 : In the Label tab, click Create Label.
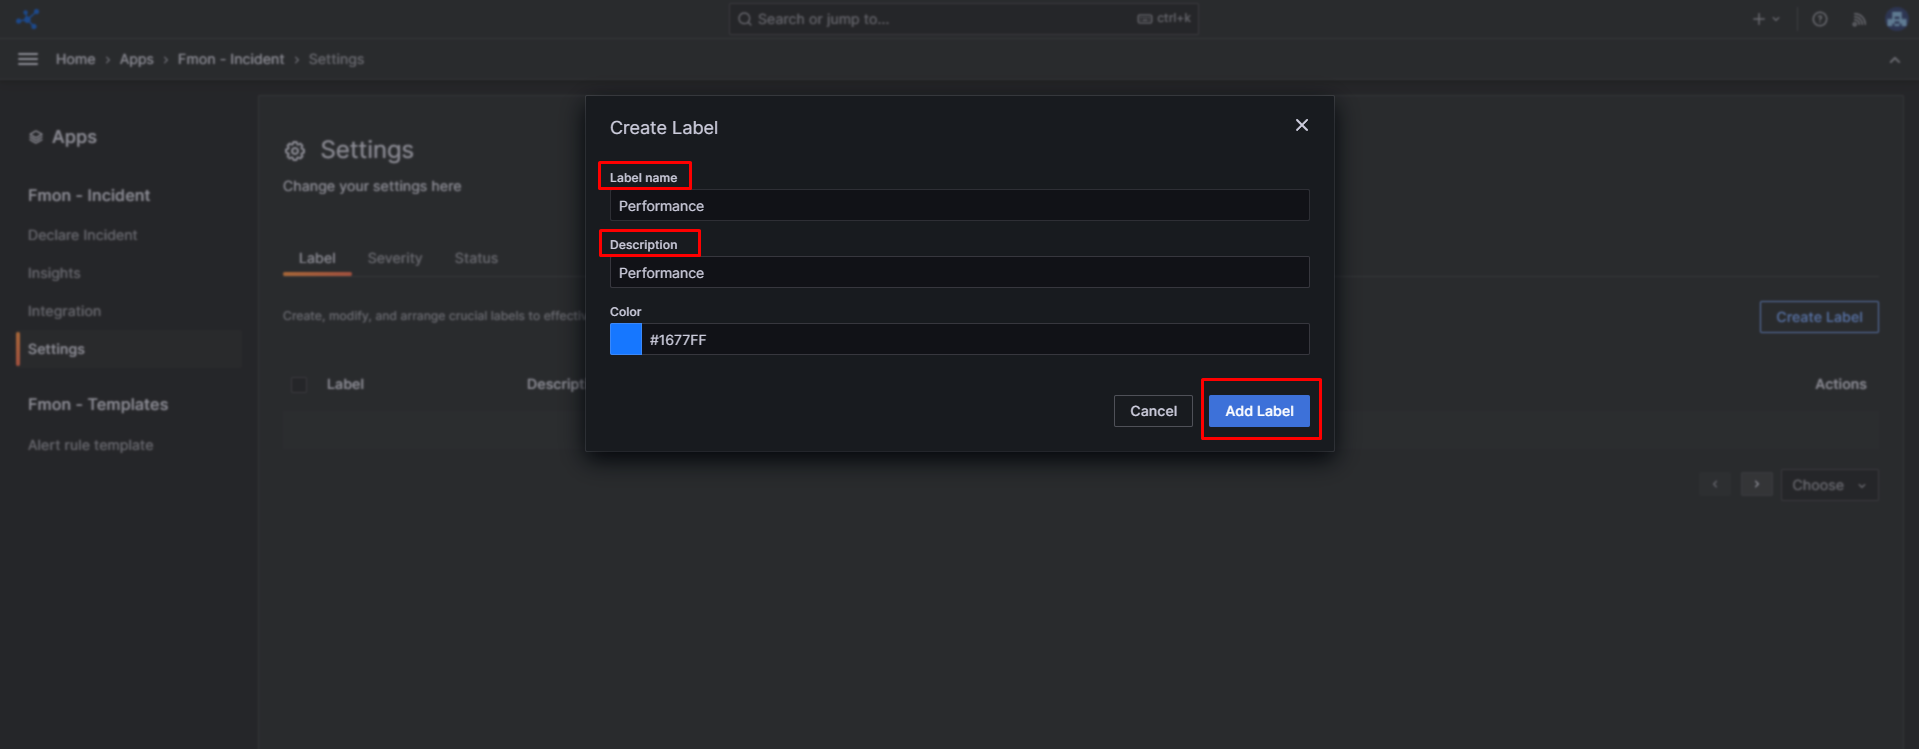
 Step 4 : Enter a Name and Description for the label.
Step 5 : (Optional) Select a color for the label.
Step 6 : Click Add Label to create the label
Step 4 : Enter a Name and Description for the label.
Step 5 : (Optional) Select a color for the label.
Step 6 : Click Add Label to create the label
 Repeat to create additional labels.
B. Updating label
Step 1 : From the sidebar menu, choose Apps , then click FMON - Incident
Step 2 : Click Settings
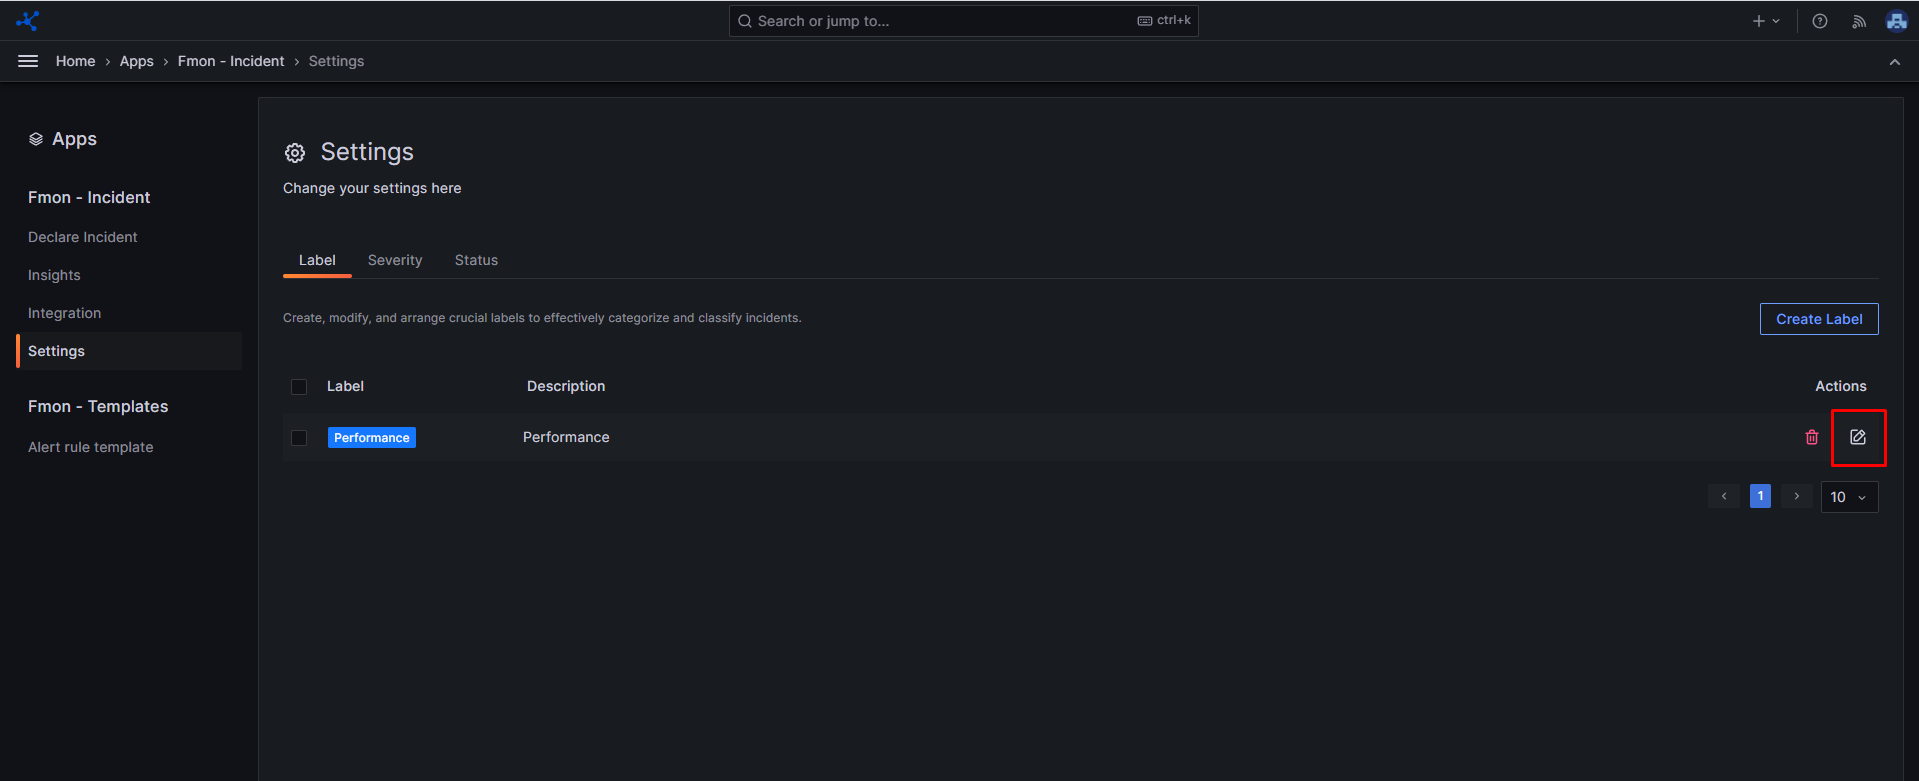
Step 3 : In the Label tab, choose a label that has been created, then click the Edit icon.
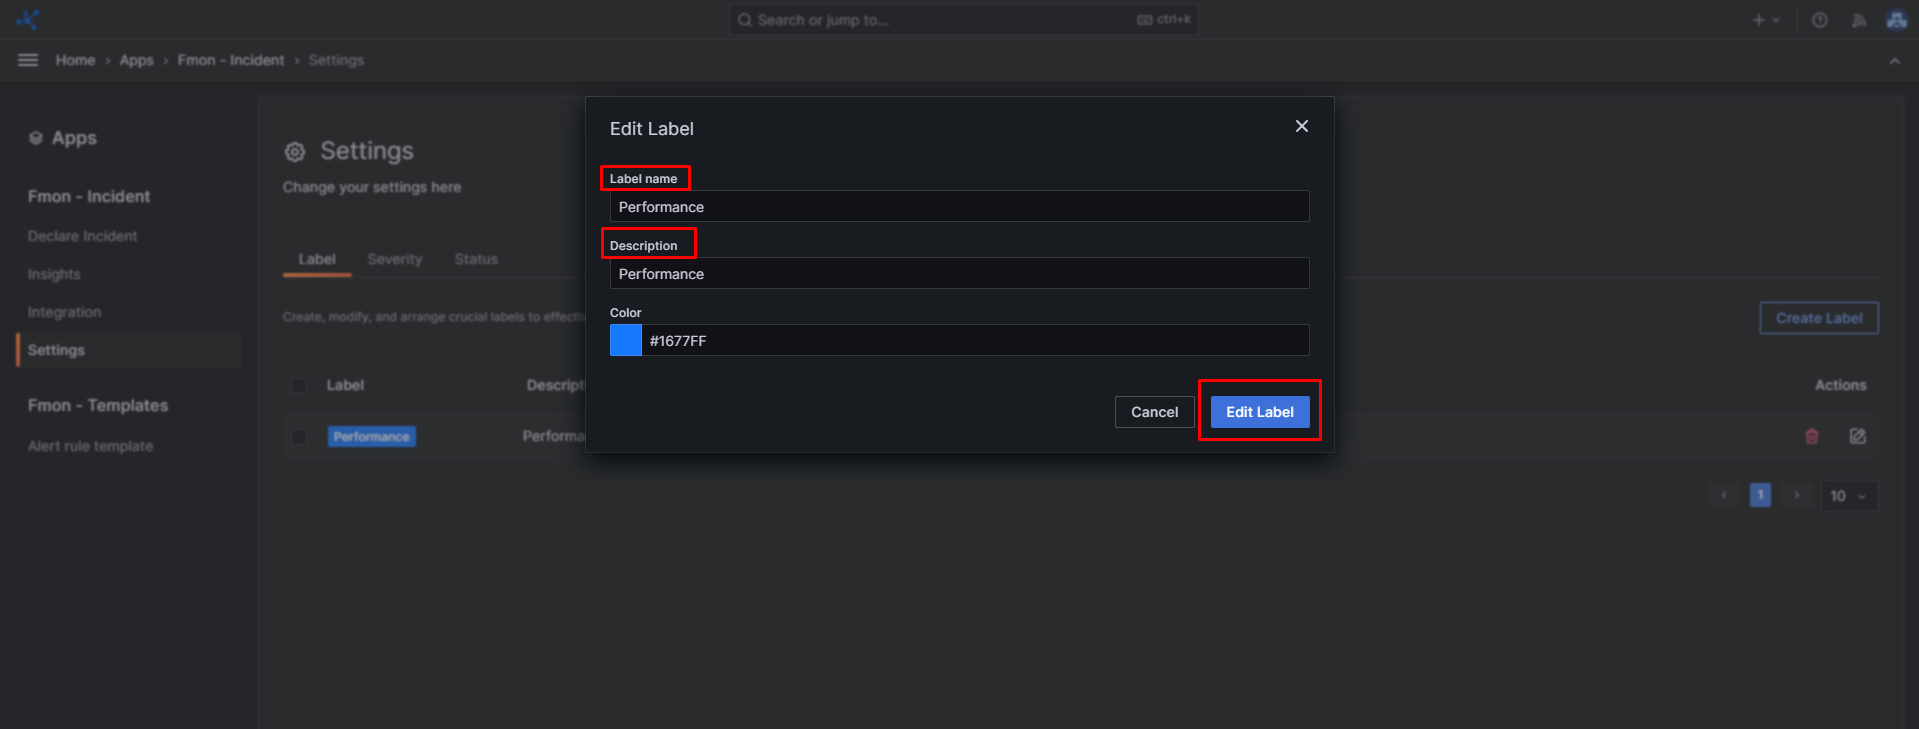
 Step 4 : Edit the Name and Description for the label if desired.
Step 5 : Select a color for the label if desired.
Step 6 : Click Edit Label to update the label
Step 4 : Edit the Name and Description for the label if desired.
Step 5 : Select a color for the label if desired.
Step 6 : Click Edit Label to update the label
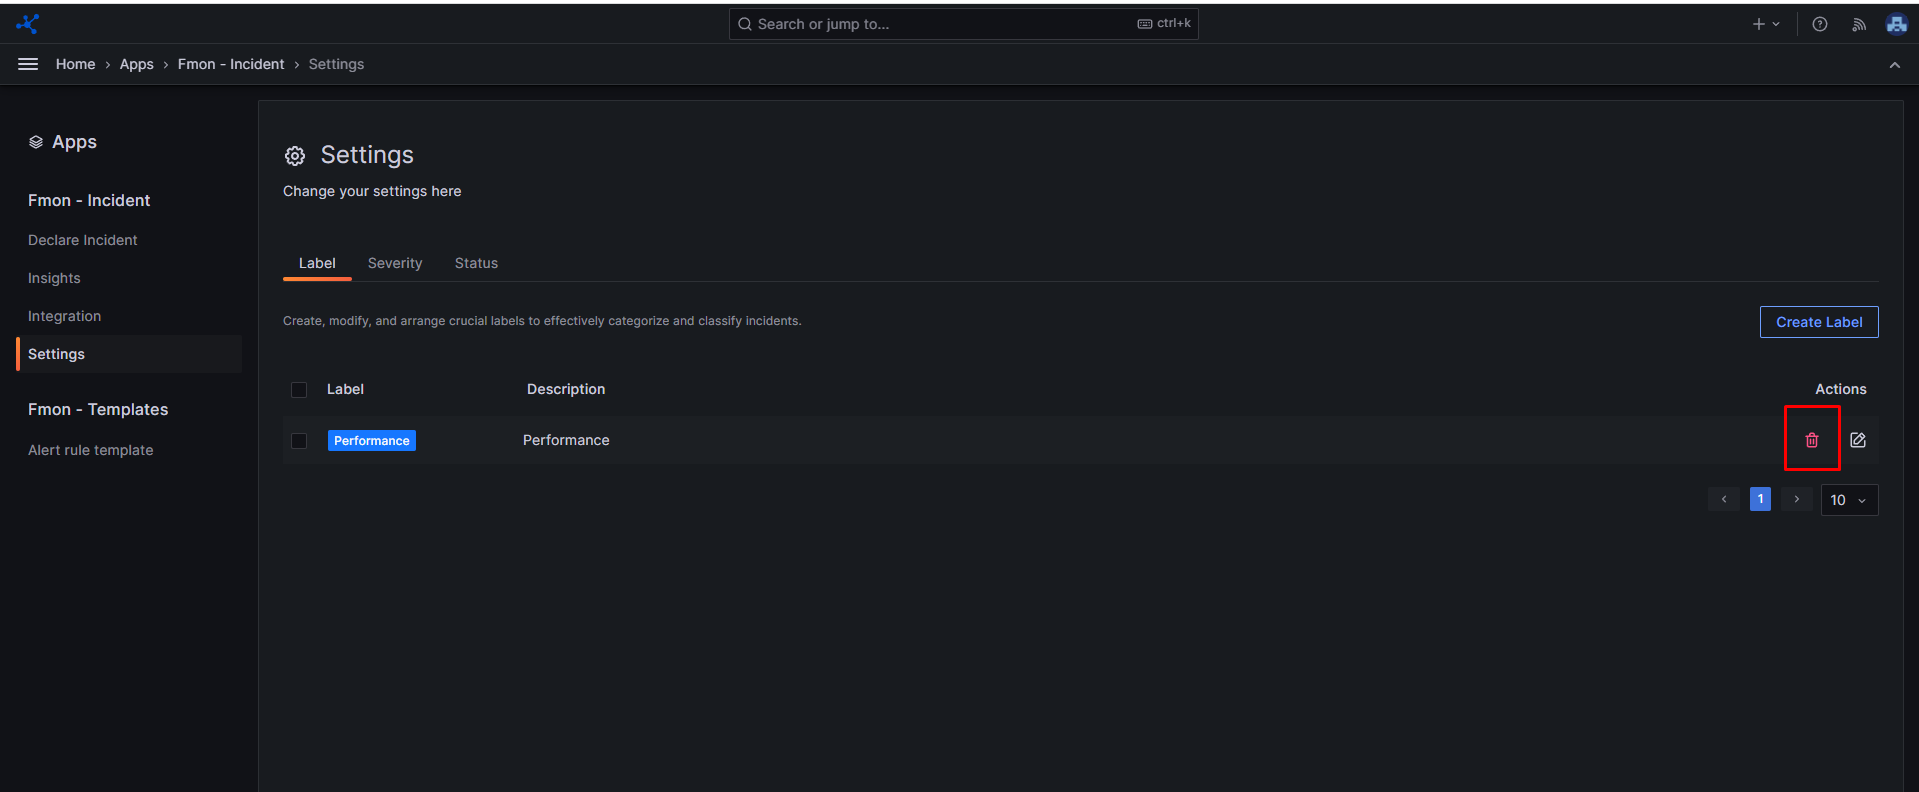
C. Deleting label
Step 1 : From the sidebar menu, choose Apps , then click FMON - Incident
Step 2 : Click Settings
Step 3 : In the Label tab, choose a label that has been created, then click the Delete icon.
 Step 4 : Click Delete in the popup window to confirm deletion.