Configure Waf Server Connection
1. Connect the WAF Server to the Web Server
- In cases the User's Web Server is in the same VPC as the WAF server on FPT Cloud, ensure that the Web Server belongs to the Subnet of the WAF server.
- In cases the User's Web Server is located outside the FPT Cloud VPC, the WAF server must establish a connection to the Web Server using the Web Server's Public IP address.
2. Add a New Proxy Host to Forward End User Requests through the WAF Server to the Web Server
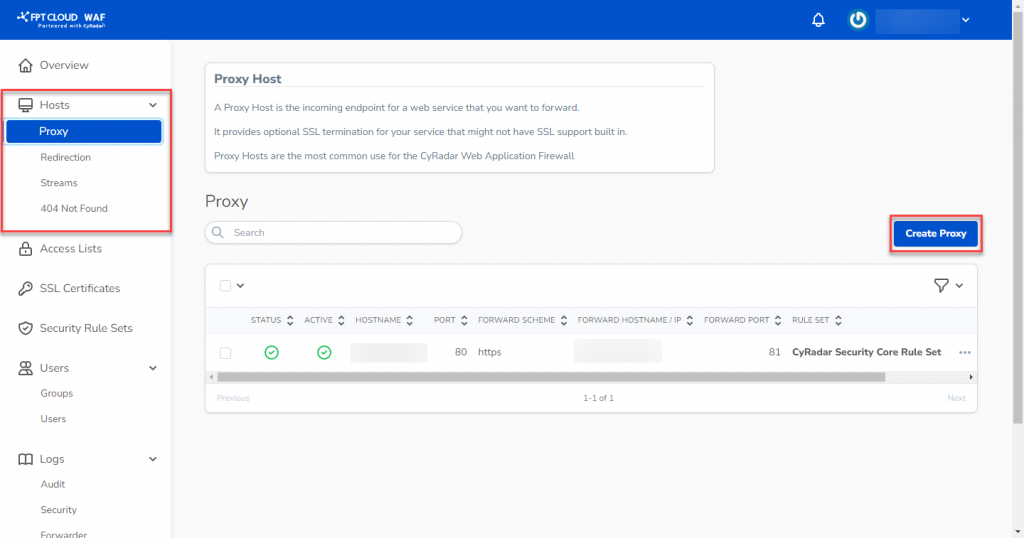
Step 1: In the WAF Dashboard , select Hosts > Proxy. Choose Create Proxy.
 Step 2: Enter the information as instructed.
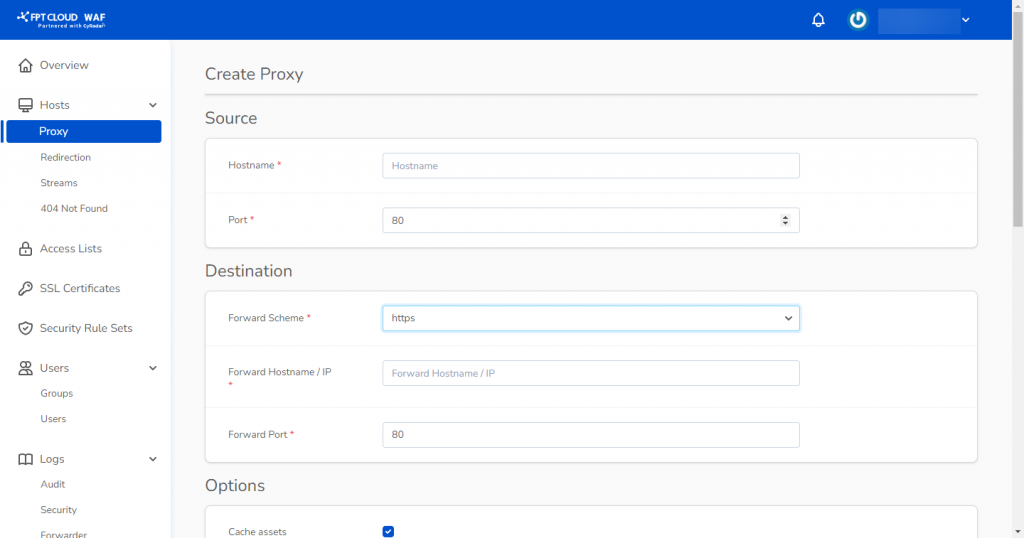
- Enter Source information:
-
* **Hostname** : Enter the domain name- Port : Default is 80; if there is an SSL Certificate, you can choose port 443.
- Enter Destination information:
-
* **Forward Scheme** : Choose http/https- Forward Hostname/IP : Enter the Public IP or Domain of the Web Server. If WAF server and Web Server are in the same subnet, you can use the IP Private.
- Forward Port: : Enter the port used by the Web Server. Note: Forward Port is the port opened for connection on the Web Server.
- Security : Choose Default Rule ( CyWAF Rule) to apply FPT Cloud WAF's optimized rule set.
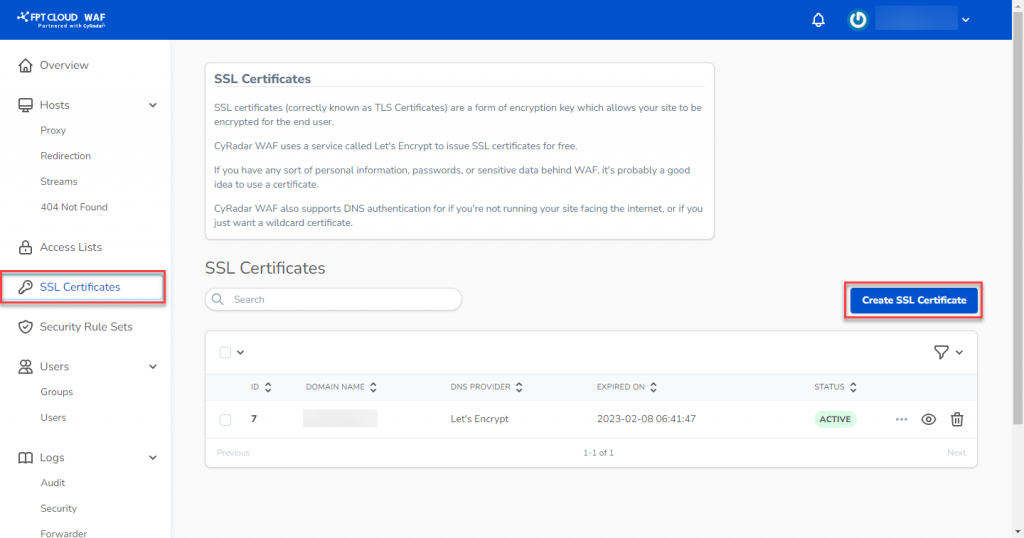
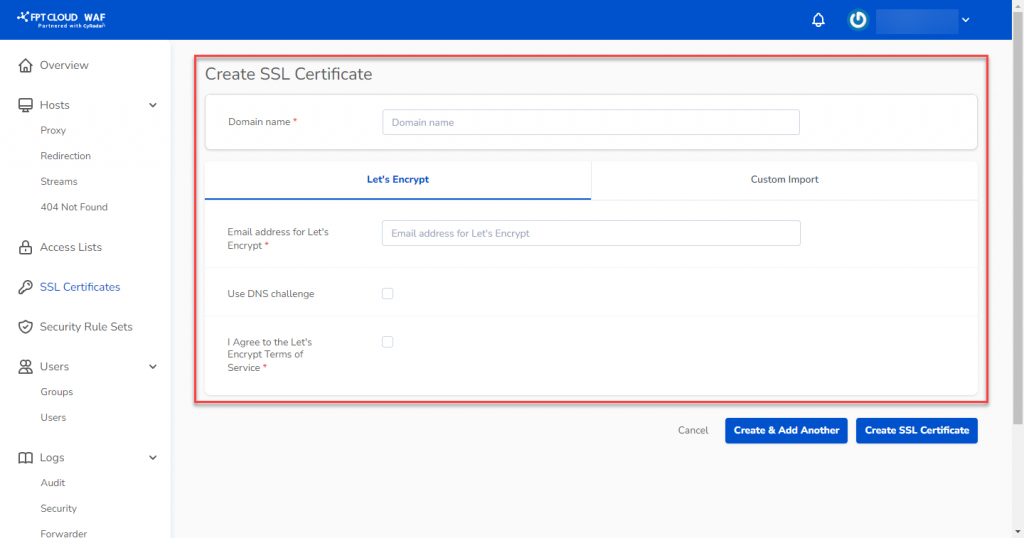
3. Add a New SSL Certificate
Step 1: In the WAF Dashboard , select SSL Certificates. Choose Create SSL Certificates.
 Step 2: Enter the information in the Quản lý SSL Certificates section
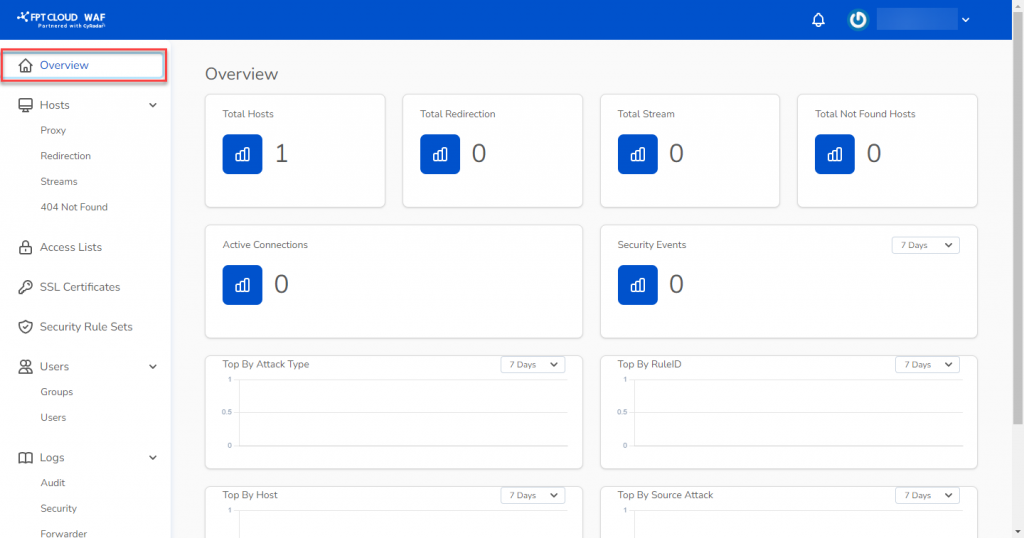
4. Dashboard Overview
After successfully connecting the domain/website to the WAF server, returns to the Overview page to monitor the status of the WAF server.