Create A Role And Assign Permissions To The Role
To create a new Custom Role, follow these steps:
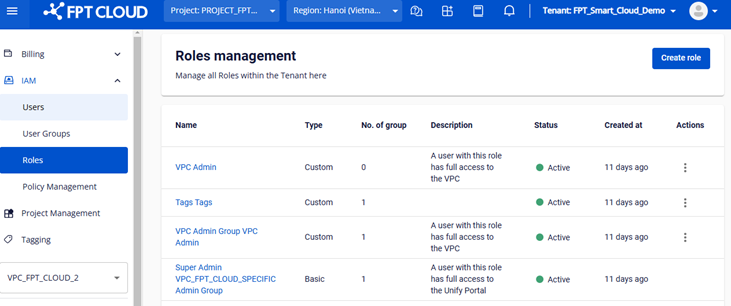
Step 1 : From the menu, select IAM > Roles , then click Create Role.
 Step 2 : On the Create Role page, enter the required information:
- Name : Enter a name for the role (required). The name can be up to 100 characters long and must consist of letters, numbers, underscores, hyphens, spaces, and dots. The name must be unique.
- Description : Provide a description of the role (optional).
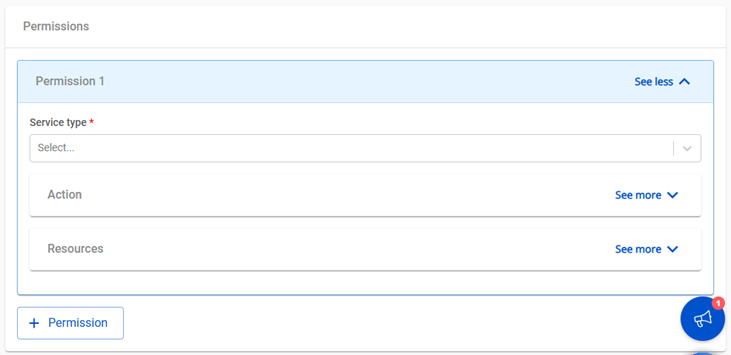
- Permissions : Includes three components:
- Service Type : A list of system services (e.g., compute, storage, networking).
- Action : Actions available for the selected service (e.g., Create Instance, Edit Instance, Delete Instance).
- Resource : The resources the user is authorized to interact with.
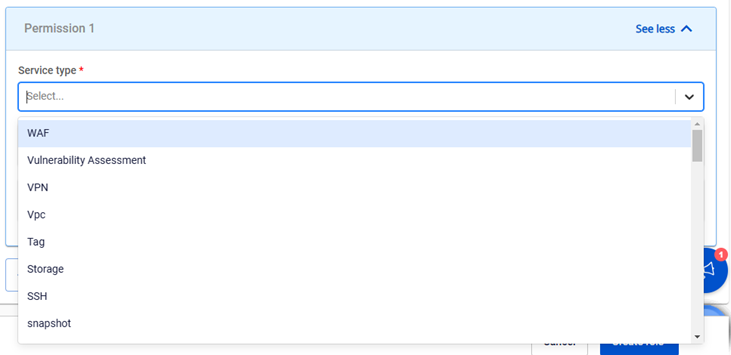
Step 2.1 : Select Service Type
- Click the dropdown list to choose a service type.
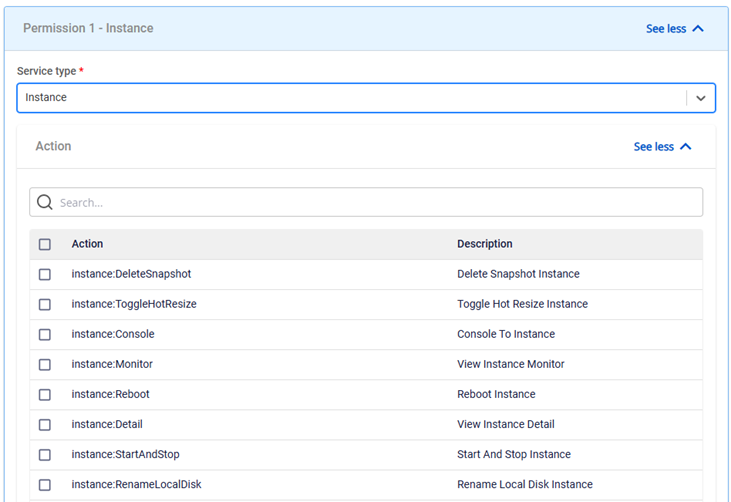
 Step 2.2 : Select Action
- After selecting a service type, the system will display the list of actions for that service.
- Select actions to assign permissions.
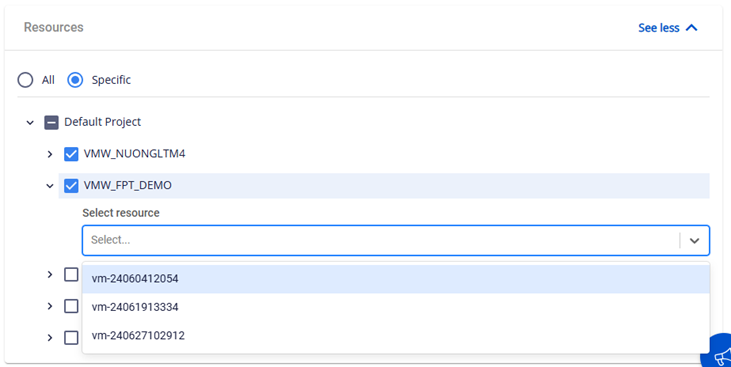
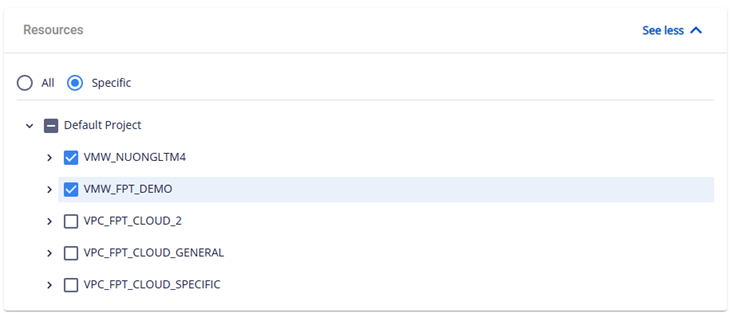
 Step 2.3 : Select resources for the chosen actions. There are two options:
- All : Assign permissions to all resources within the tenant (all Projects and VPCs under the tenant).
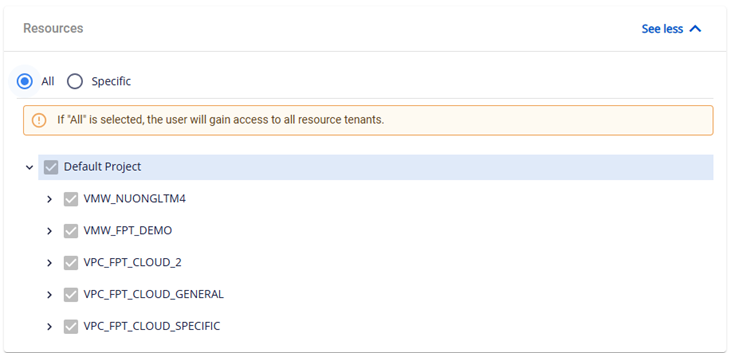
- Specific : Assign permissions to specific resources.
- For virtual machine services: You can assign permissions to individual VMs.
- For other services: Permissions can be assigned at the Project or VPC level.
 Step 3 : Click Create. The system will process the request and display the result.