Create New K8S Cluster
Note : Some mandatory conditions for performing this operation:
- CPU, RAM, Storage , and Instance quotas must be sufficient for the desired Cluster configuration.
- 01 Public IP Available: Used for the Kubernetes API and Ingress.
- 01 VM Network : Network used for Kubernetes Nodes. Create a Subnet with a Static IP Pool as instructed here.
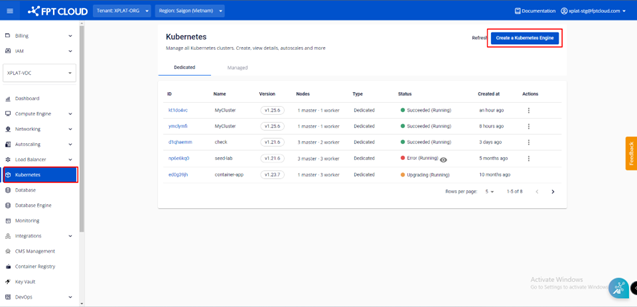
Step 1 : In the FPT Portal menu, select Kubernetes > Create.
 Step 2 : Enter Cluster's general information and click
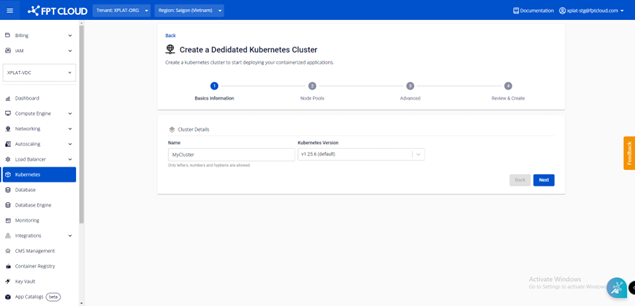
- Name : Enter the Cluster name.
- Version : Choose a Kubernetes version.
Step 3 : Configure Node Pools as desired, then click

Storage Policy & Load Balancer
- Policy : Choose Storage Policy for Disk of VMs in the Kubernetes Cluster.
- LB Size : Load Balancer's config:
- Standard : Max 2000 CCU, 4000 HTTP req/s, bandwidth 100Mbps.
- Advanced : Max 4000 CCU, 8000 HTTP req/s, bandwidth 100Mbps.
- Premium : Max 8000 CCU, 16000 HTTP req/s, bandwidth 100Mbps.
Master Node Configuration
- Type : Choose CPU & Memory configuration for Master Node
- Disk (GB) : Choose root disk’s capacity for Master Node
- High Availability :
- Disable: Quantity (1) corresponds to the number of Master Node's VM instance for this Cluster is 01.
- Enable: Quantity (3) corresponds to the number of Master Node's VM instance for this Cluster is 03.
Worker Node Configuration
- Type : Choose CPU & Memory configuration for Worker Nodes
- Disk (GB) : Choose root disk’s capacity for Worker Nodes
- Quantity : Number of Worker Nodes for this Cluster
- Autoscale : Enable/Disable Autoscale function for this Cluster. If you select Enable , please enter the Scale Min value (number of remaining nodes when scaling down) and Scale Max value (maximum number of nodes when scaling up).
Node Credentials:
- SSH Keys : Key is used for access VM Node (user root). If you haven’t create one, please follows the instructions here.
Step 4 : Configure Advanced configuration, then click
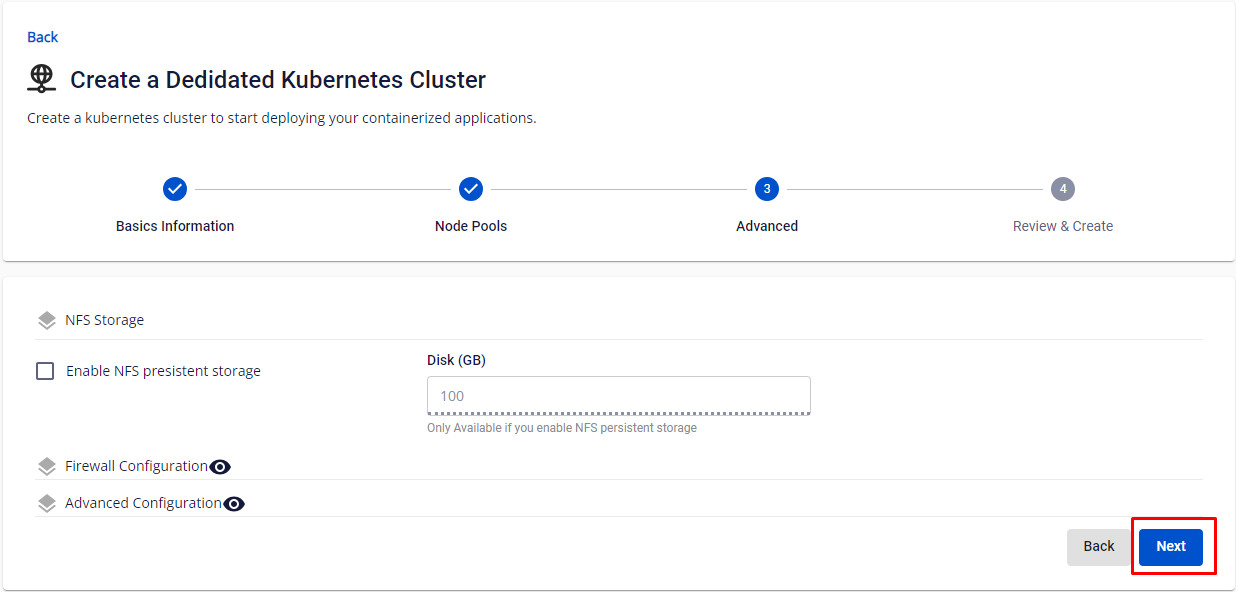
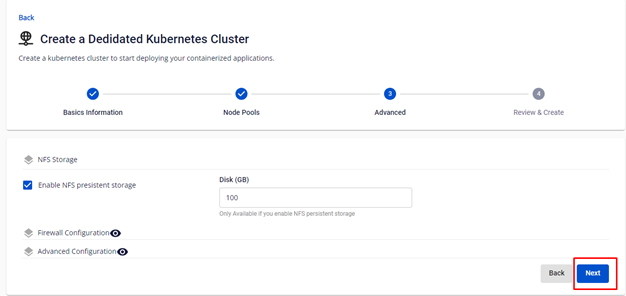
NFS Storage:
- Enable NFS Persistent Storage : Enabling NFS Persistent Storage to be deploy along with this Cluster.
- Disk (GB) : Capacity of NFS Storage. Remember to have suitable sizing, changing disk capacity will hvae to be done manually by the user.
Firewall Configuration:
These settings are for advanced users, click theview icon to expand. If you do not understand these parameters, leave them as default.
- Enable Firewall : Select to configure Edge IP, Public IP, Private IP with Kubernetes Cluster.
Advanced Config:
These settings are also for advanced users, click theview icon to expand. If you do not understand these parameters, leave them as default.
- Pod Network : Network used for Pods in the cluster.
- Service Network : Network used for Services in the cluster.
- Network Node Prefix : Subnet Prefix for Pods in the Node.
- Max Pod per Node : Maximum number of Pods on each Kubernetes Node.
- Node DNS : DNS is used for Nodes and Kubernetes Cluster. Enter your desired DNS to use your DNS system.
Step 5 : Click
The system will display a screen to confirm all entered information, to check the resources and proceed with the process of initializing the Kubernetes Cluster based on the selected configuration.
 Step 6 : Click Create a Kubernetes.
The system will configure, check for resources quota, and initiate the process of creating the Kubernetes Cluster based on the selected configuration.
Step 6 : Click Create a Kubernetes.
The system will configure, check for resources quota, and initiate the process of creating the Kubernetes Cluster based on the selected configuration.
