Manage Tag To Snapshot
1. Assigning Tags While Creating a Snapshot from an Instance
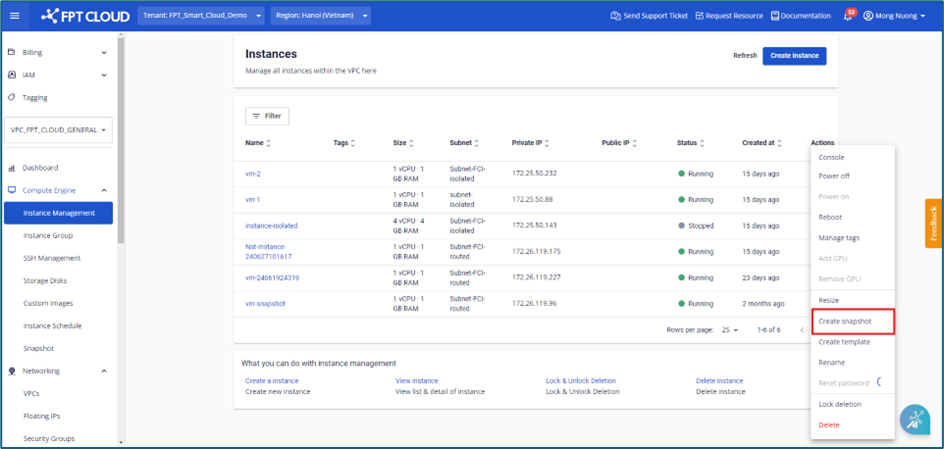
Step 1 : In the menu, select Instance Management , click Actions , then choose Create snapshot.
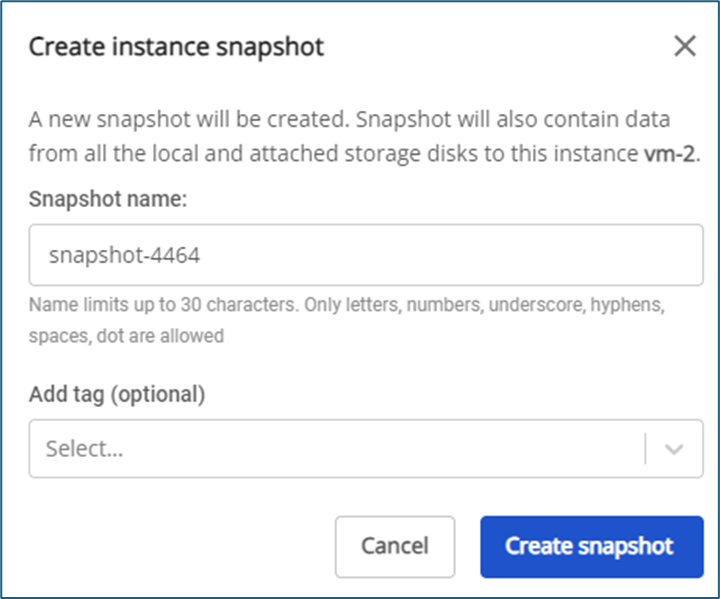
 *Step 2 : In the Create instance snapshot dialog box, users can select tags in the Add tag (optional) field to assign tags to the snapshot.
2. Assigning Tags While Creating a Snapshot from a Storage Disk
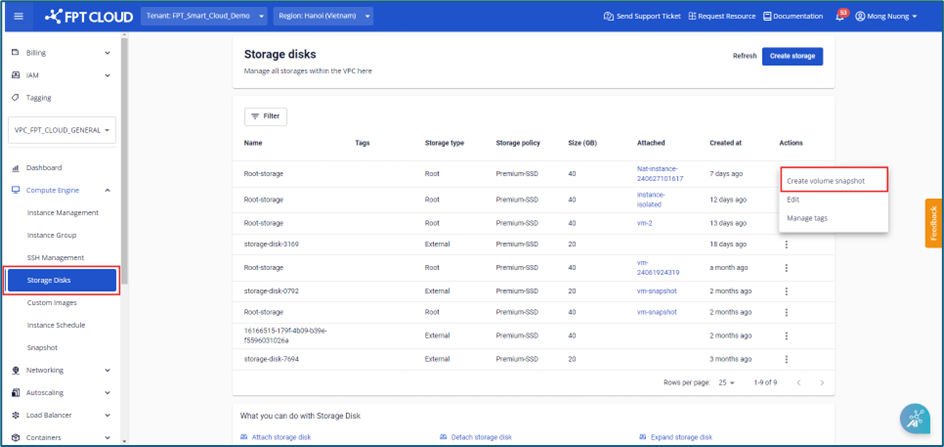
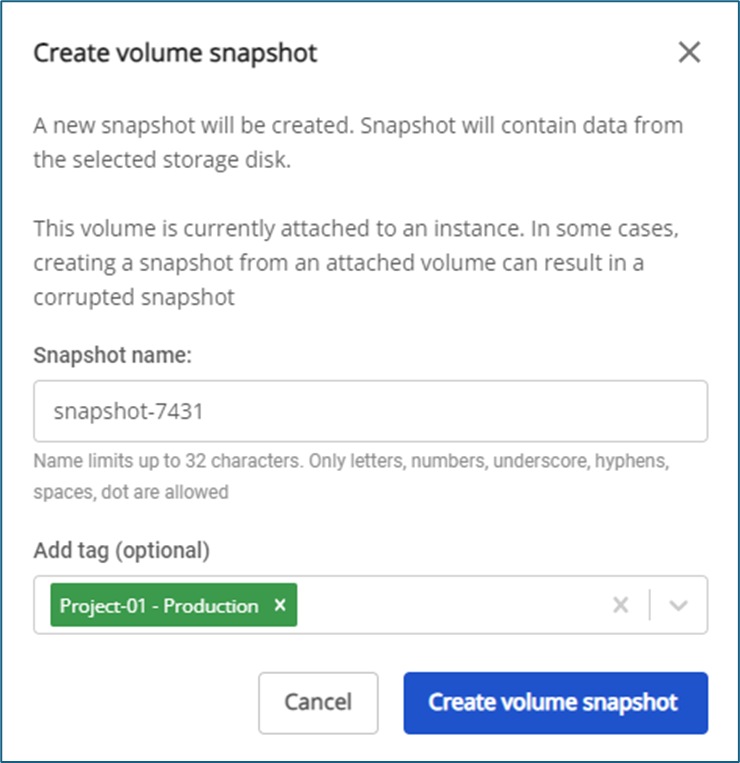
Step 1 : In the menu, select Storage Disk , click Actions , then choose Create volume snapshot.
 Step 2 : In the Create volume snapshot dialog box, users can select tags in the Add tag (optional) field to assign tags to the snapshot.
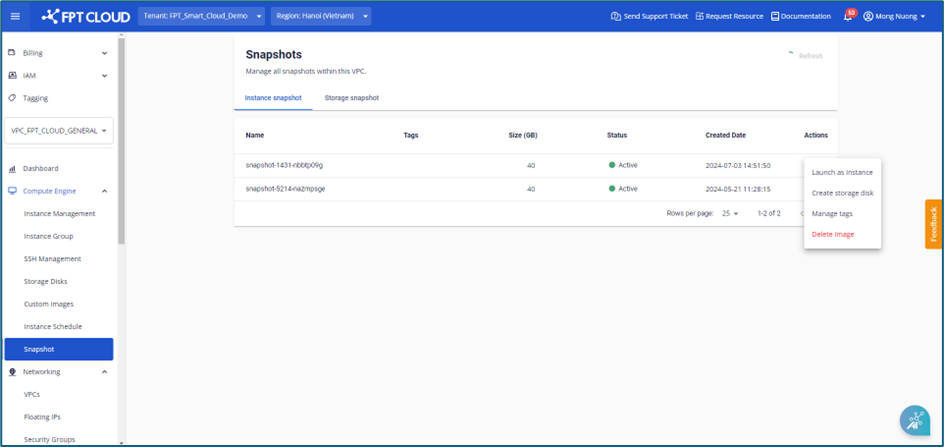
3. Managing Tags for a Snapshot
Step 1 : In the menu, select Snapshot. In the Instance snapshot tab, click Manage tags.
 Step 2 : A dialog box will appear, allowing users to select tags to assign to the snapshot.
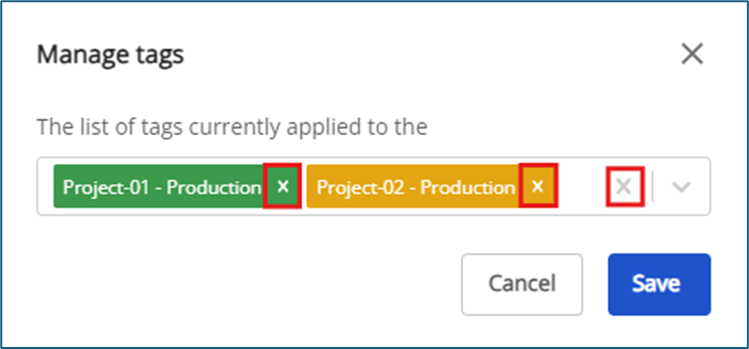
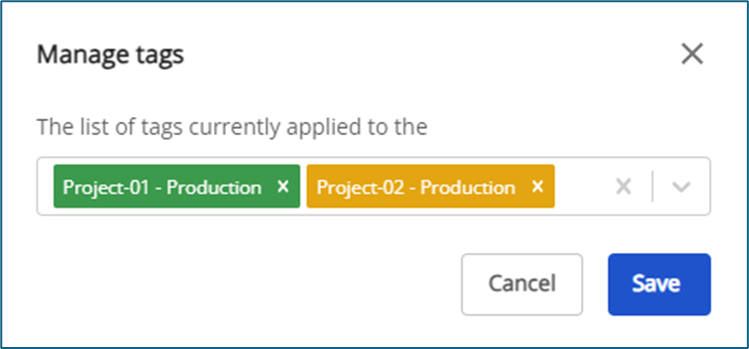 Step 3 : Removing Tags from an Instance Snapshot
To remove a tag, click the “x” next to the tag name. Users can also click the “x” at the end of the list box to remove all tags at once. Then, click Save to confirm the changes.
Note: When a snapshot is deleted, the system will automatically remove all associated tags and update the tag list on the Tagging screen.
Step 3 : Removing Tags from an Instance Snapshot
To remove a tag, click the “x” next to the tag name. Users can also click the “x” at the end of the list box to remove all tags at once. Then, click Save to confirm the changes.
Note: When a snapshot is deleted, the system will automatically remove all associated tags and update the tag list on the Tagging screen.