Manage tag for Load Balancer
1. Assigning tags while creating a Classic Load Balancer
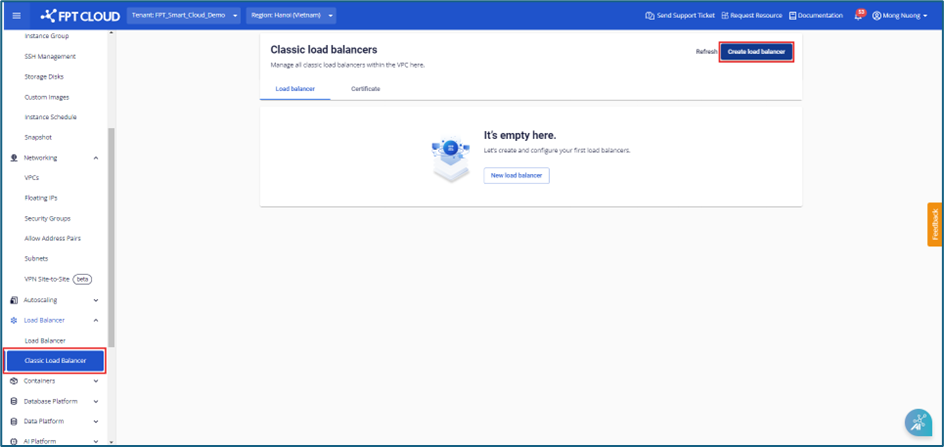
Step 1: In the menu, select Classic load balancer → click Create load balancer.
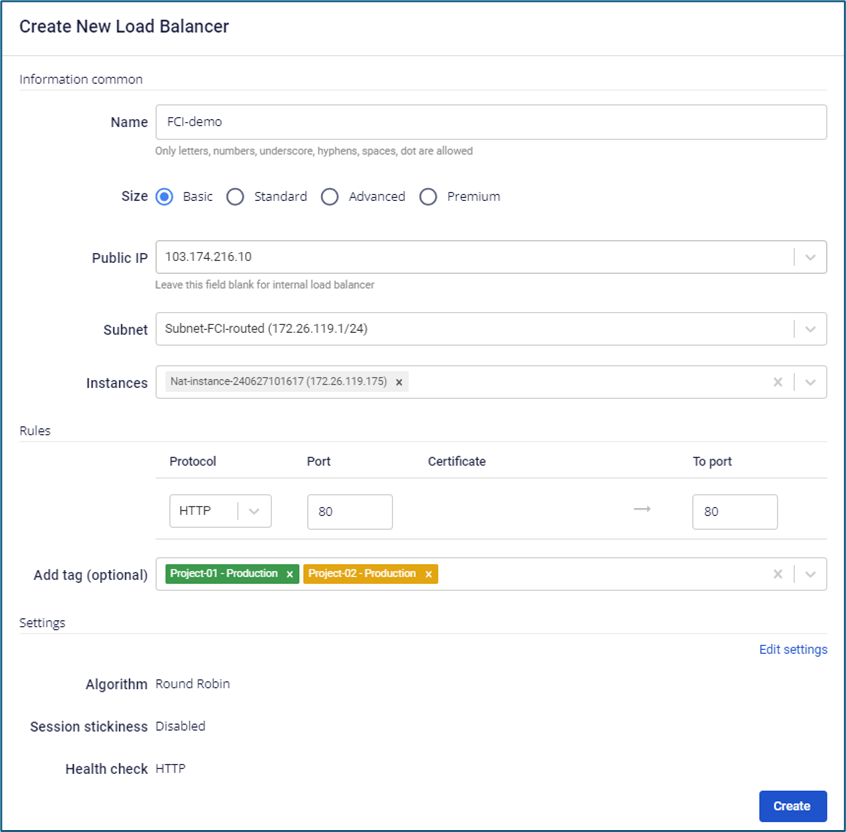
 Step 2: In the Create load balancer dialog box, select tags in the Add tag (optional) field to assign them to the load balancer.
2. Managing tags for a Load Balancer
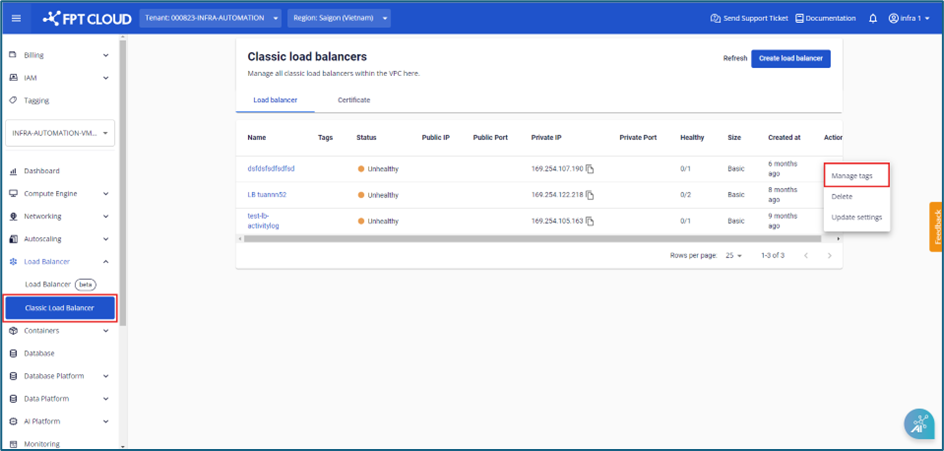
Step 1: On the Classic Load Balancer screen, select a load balancer, click Actions, then choose Manage tags.
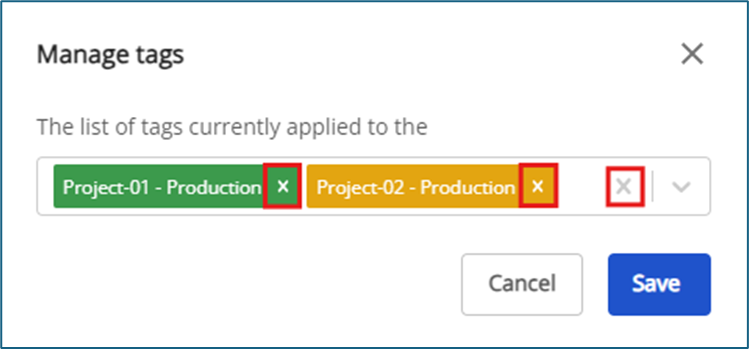
 Step 2: A dialog box appears, allowing you to select tags to assign to the load balancer.
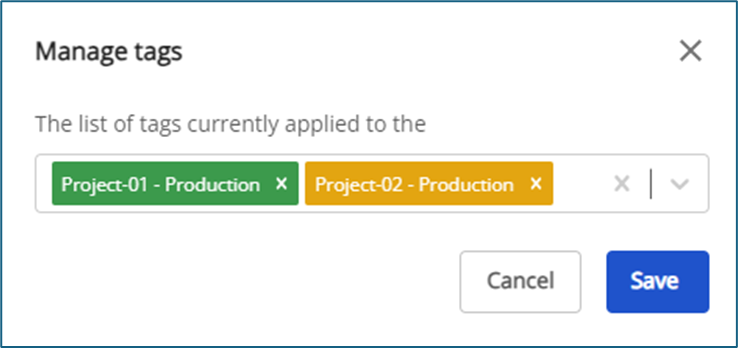 Step 3: To remove a tag from the load balancer:
- Click the "x" next to the tag name to remove it individually.
- Click the "x" at the end of the list box to remove all tags at once.
- Click Save to confirm changes.
⚠️ Warning: When a load balancer is deleted, the system automatically removes all associated tags and updates the tag list on the Tagging screen.